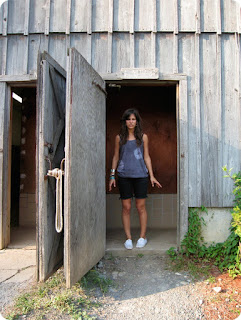
Wednesday, September 30, 2009

foreign exchange

Meet Guiseppe.
Or Bepe.
We call him Pepe.
He came from Milan and stole our hearts. 
An Italian ad man.
Funny, strange, quirky.
His broken English only made him more likable, saying things that made no sense but perfect sense at the same time because you knew what he was feeling.
Four months and it was time for him to leave, his Visa expired, the USA telling him to get out or else.
the many faces of Giuseppe.
Pepe carries with him a class photo from every year of school.
The bottom right is how I will remember him.
Ciao Pepe. Until we meet again.

Tuesday, September 29, 2009

sort of steampunk.


I used to collect random metal things I would find on the street the first couple of years I lived in the city. Not sure where this brass pulley came from, but I threw it in the tumbler and now years later I finally am using it for something.
I simply wired a blue bead (not sure where that came from either) with a loop, slipped the loop through the hole on the top of the pulley and attached a jump ring. The bead moves around freely similar to the pulley wheels. Reminds me of steampunk, but a lot less intricate.

Monday, September 28, 2009

Au Revoir Simone

If you don't know Au Revoir Simone, you should. You can get to know them by checking out they're brand new Shadows video. Bravo girls! Annie, you are one of the coolest girls I know.

I am keeping my facebook caption: I Hart Annie!

Friday, September 25, 2009

silk scarf diy


I can never have too many scarves and when I see a fabulous piece of silk, I want it wrapped around my neck immediately. When I caught a glimpse of this gemstone snake patterned silk chiffon, I compulsively ran out to buy some. $20 for two yards and I made a ginormous scarf wrap that I will be covered in all fall.


When you buy fabric, it is usually snipped at your requested yard mark and then ripped along the vertical strands of the weave. This squares off the rectangle of fabric, but leaves a
jagged edge.

To clean up the edge, first snip all the ripped fibers off, down to the first horizontal strand, with scissors. Then one-by-one start pulling the horizontal strands out, unraveling the weave.
You might need to snip the ends when you get to the selvage, which are the tightly woven edges that run along the lengthwise grain of a piece of fabric.
Once you have unraveled about an inch of horizontal threads, you'll have a nice frayed edge. Do the other side and you'll have a handmade scarf!


Something as easy as this makes a really sweet gift too. I bought 2 more yards of the silk and made a scarf for
Melissa over Labor Day weekend. What a nice sister I am!

And what an awesome sister I have! love you meli! ox


Tuesday, September 22, 2009

new toy. tumbler.


What is that?
Oh well that's my tumbler!
It helps me polish and shine.
I fill it with my casted pieces, mixed shot, a tablespoon of conditioner (Oakite), and water, flick a switch (round and round it goes), walk away and hours of what would of been hand polishing, this baby does for you!
Look what it can do to an old penny.
It is so shiny, I could barely get a good picture of it!

Metalliferous and Rio Grande are both great sources for jewelry making tools and supplies.
If you are a nyc local— I like to visit the jewelry exchange on 47th street between 5th and 6th avenue– poke around, stare at the gold and diamonds in the windows and then stop by Myron Toback to pick up any elements I might need.

Monday, September 21, 2009

It's a boy!

not quite!
But it is Ashley's birthday and I am eagerly awaiting for his present to arrive. The new Canon S90!!! So excited Canon revisited this series! Ashley had the S80 for about 5 years until I knocked it out of his hands and onto the the floor at a recent DCBR show and I am still currently using my S80. Ashley alone had probably taken over 10,000 photos on his S80 and the thing was solid. Hopefully the S90 will be just as good if not better. So excited for this camera, you have no idea!!!


Happy Birthday Ashley! oxo

Wednesday, September 16, 2009

mining for diamonds.

A sun packed, fun packed, refreshing long weekend came to an end last Monday and it was time to drive home. Pico, Ashley, and I loaded up the car, but decided we needed one more adventure before facing the hours back to the city. After stopping at a half dozen yard sales on route 9 and packing the car with more odds and ends, we made it to the final destination at 4 o'clock.
I blame Hosanna (also a Martha crafter) for dazzling me in August when she showed me the amazing Herkimer diamonds she mined over the summer. I became obsessed with the idea of hunting for a treasure and needed to go diamond mining myself. Well, 3 hours west and way out of the way (sorry Ashley and Pico) I was about to have my chance.


Turns out Ace closes at 5 and it takes a lot longer than an hour to score the fabulous gems. $8, a hammer, and a hand rake later, I was determined. But where do we start?
"Well I don't know, let's just start smashing rocks"... and whacking them and digging under other rocks for the one that might be golden...

... "Oh it's hopeless!" My arm was tired, I had blisters on my hands, dust covering my legs and my hair was sticking to my sweating face! No wonder diamonds are so expensive! This is hard work!
And then Ashley finds one... and another.... and some more.... seriously WTF! How come I can't find any!

And then the siren goes off– the race is over– and the mine is closing and I got nothing!
I start to smash everything in sight as I retreat from the mound. No success for Kristin and Pico is pissed, but Ashley found at least one really nice one.


And another one still embedded in a rock he cracked open.


It is really amazing how these crystals grow in there!

After I cleaned myself up and returned the tools back to the office, I pouted back to the car.
4 hours back to the city without anything to show from my diamond hunt. Next time I think I need a full day, some gloves, the correct attire, a hair tie, a fanny pack, and probably an awl or something to aid in precision rock breaking and I think Pico might need to sit this one out.

Next time, next time...

Tuesday, September 15, 2009

underwater adventures!


Over Labor Day weekend, Ashley, Pico and I ventured up north to Lake George for my annual "best friends" getaway. We are so lucky Amanda has a summer home where we can all gather together, away from the hot concrete and into the beautiful forests of the Adirondacks and the clear waters of the lake.
Ashley has this crazy underwater housing for his camera, so being in the water is a whole other experience. Ashley becomes a kid again with this thing, I swear! "Come on Kristin! Come in!" He just loves swimming and snapping pictures...


And everyone enjoys posing underwater. How often to do get to capture yourself in a setting like this?


The photographs can be so beautiful too. The peaceful, almost lonely feeling of being submerged in crystal clear freshness captured! A little eerie but completely joyous!


Yet totally hilarious and ridiculously fun!

Especially when you try to drown each other...

After all the under water fun comes the into-the-water craziness. Might just look like a jump...


But it's really Super Ashley flying through the air!


Most everyone looks goofy in mid jump...


... but look closer—Melanie and Pepe look hilarious!


Pico also had some fun in the sun...


And was quite fond of the room we slept it. It matched her almost perfectly!

Oh how I look forward to next year.
Thanks Minger for having us up! ox

Friday, September 11, 2009

Juxtaposition?

Funny... I worked late last night and went straight to the Motorhead show.
It just so happened, I wore a shirt to work that I
picked out of a donation bag of
Martha's clothes that her stylist was getting rid of—
didn't have time to go home and change.

Imagine wearing Martha Stewart's clothes to a Motorhead show?
Brilliant! I was probably the only person not wearing black.


I bought a Motorhead shirt before I left.

Thursday, September 10, 2009

Might as well...


tie dye.
When I was mixing the black dye bath for the holey shirt, Ashley suggested it. Well of course! I love to tie dye! I thought about what I had that I could possible destroy and thought of a stained shirt I had — perfect!
So I pinched and twisted the fabric in a few spots and tied the twists in place with thick rubber bands.


I ran the whole shirt under the faucet and then submerged it in the dye bath and left it there with the other shirt— I admit, I snuck in a pair of jeans too.


and when I released the rubber bands, I remembered why tie dyeing is so fun! Surprise!

Wednesday, September 9, 2009

hol(e)y shi(r)t.


Here's an easy little sewing project that might surprise you with some interesting results. It started for me as a total experiment but I do kind of love how it turned out. The technique is reverse applique and here's how I make it:


1. got a pink tank top on sale at the Gap
2. found some lace scraps
3. turned shirt inside out
4. drew some circles along the inside seam
5. pinned lace circles a bit larger over the drawn circles
6. with a sewing machine, sewed over the lace around each circle, sometimes going around twice
7. for each circle, pulled the bottom thread through, so that both thread ends were on the inside of shirt, and then knotted them together


Here's what it looked like so far:


I was totally not satisfied with the color... pink... so I decided to dye it... black...
So I:
8. got some RIT black dye
9. in a medium size bin, mixed the full bottle of RIT with 1 cup of kosher salt and some water


10. saturated the shirt with water
11. submerged the shirt into the dye bath
12. let it soak in the bath for about 6 hours
13. rinsed it in cold water
14. threw it in the washing machine, alone
15. and let it hang dry.


Time for revealing the lace!
16. Carefully cut around the inside of each circle, only cutting the tank material, not the lace.


I left some circles without lace underneath so that all you see is straight up flesh when it's on... scandalous... not really, just wanted that contrast!

17. Done. Wear it.
Looks pretty cool, different, maybe a little odd. I like it.


Tuesday, September 1, 2009

fringey pouch


I wanted a fairly small, light-weight sling bag for going out—for those times when all I need to carry is some cash, an id, and my phone. I have never owned a clutch and probably never will; I find them terribly annoying and inconvenient. I like a hands free bag, so I can snap a photo and hold a drink, but not have a bulge in my back pocket. So I decided to make my ideal going out bag—a little Native American inspired with a 80's punky vibe...

I purchased this really nice black hide from this really old leather man that has a shop around the corner from work. I think most of his hides are quite old, like him and his shop, so I don't feel as bad buying animal skin as I would if they were new (it's the only way I can justify it to myself, guilt).

For the fringe, I cut a 7.5" x 3" rectangle from the hide and cut it into 1/8" strips leaving about a 1/2" on the top so the strips stayed together. I wasn't sure exactly how big I was going to make the bag or the exact shape so I held hands over the hide to get an idea.

"Ooow, I like that shape," I thought. It looks like a shield and my hands oddly, naturally make it. So I traced the shape my left hand made onto a piece of paper, then folded it in half so the bottom point was at the fold. I cut it out with scissors and unfolded to get my perfectly symmetrical template.

I traced the template onto a corner of the hide and cut that out with sharp fabric shears. Using Barge, an all purpose cement, I attached the fringe to the bottom back of the piece and placed the now shield shape with fringe onto the hide.

I roughly cut around the piece, leaving a good 7" on the top for the fold-over flap.
I laid the fringe shield piece over to the bottom edge of the new longer piece and was ready to stitch. Leather can be pretty tough to get through so I used the same technique I used to make the industrial felt case. I used my Dremel Stylus and drilled over a piece of wood along the edge of the shield shape every 1/8 of an inch through the two pieces of leather. I suppose you could also use an awl and hammer to make the holes as well.

I hand stitched around the shield with black waxed twine and an embroidery needle and then cut out the back piece of leather around the shield.

I folded the pouch over to create the flap and loosely sketched how I wanted the flap to hang over the pouch—a little longer and saddle bag shape.

I cut the flap out with fabric pinking shears.

I decided on a chain strap but chains can get uncomfortable so I weaved a strip of leather that I cut from the hide through the chain to soften it up a bit, leaving a lot of extra length on each end of the chain so it could be attached and tied to the purse.

I punched small holes in the back top of the pouch part with a leather punch and hammer (i had planned on using eyelets but nixed that idea) and strung the leather strip ends though the hole and tied knots. I left the leather strips from the chains long because they kind of just blend in with the fringe anyway.

It took me a few days to decide what exactly I wanted to do with the front (the flap) of the bag. I played around with studs, resin "ivory" pendants and beads, different stitch patterns and different leather applique. With some random leather scraps of two different leathers, I liked the three triangle pattern the best. With masking tape I taped around the loose triangles in their final positions and then removed them. With Barge, each side gets a coat of glue and is let to dry. So I coated the triangle backs and within the tape spaces painted with glue as well.

When the glue was dry, I carefully peeled the tape up and stuck the triangle shapes onto the flap.

Using the same process as before, I drilled holes through the applique and flap to make stitching with the waxed twine easier.

I did a straight stitch around each triangle then stitched around again to fill in the gaps.

I wasn't convinced the bag was complete until it had a little flair. so I quickly whipped up a tassel that consisted of a mini vintage key, a piece of waxed twine with 6 crystal beads knotted at both ends, a skull charm with rhinestone eyes, and some thin chain from a lost earring I found and took apart. I attached all the pieces to a mini key ring and then to the chain strap of the bag.

And I made it! Done.